Malware analysis (II) - Basic static analysis: strings and metadata
The day has come. It’s time to pick up where I left off months ago and continue with the series on malware analysis. This is the second part of an article series. In the previous article, I discussed the basics, different techniques for malware analysis, how to obtain samples, and some basic programs for conducting this type of analysis.
First of all, it’s important to remember the different types of analysis that exist. Basically, they can be divided into four different types:
- Static Analysis: Involves analysing information about the malware without examining its code or executing it, such as metadata, signatures, format, binary sections, etc.
- Dynamic Analysis: Involves observing the behaviour of the malware while it’s running, including interactions with files, system calls, network traffic, registry changes, etc.
- Code Analysis: Involves examining the code and is divided into two types:
- Static Code Analysis: Analysing the code without executing it.
- Dynamic Code Analysis: Analysing the code while it’s running, essentially debugging it.
There’s no strict rule about the order in which to apply these techniques or where to start. However, certain things make more sense to do before others. For instance, analysing code is not the easiest thing to do, so it’s not usually the first step. Dynamic analysis requires capturing a lot of information, so if you’re doing it locally, it makes sense to have some basic knowledge about the sample being analysed in order to focus your information collection processes: deciding which elements to monitor and prioritizing which information to analyse first.
The simplest type of analysis that can be performed is static analysis. It doesn’t require analysing the code or setting up a range of monitoring programs. Using only static analysis, a lot of information about the file type, interesting metadata, and potential type of malware can be extracted.
As a result, these techniques are usually the first ones to be applied because they are quick and allow to perform malware classification. What does classifying malware involve? Analysing malware serves two main purposes: firstly, to determine the type of malware and where it fits within the broader landscape of existing malware (“family” of malware it belongs to), and secondly, to understand its behaviour and learn from it. The former is what’s called classification.
This is because, in general, malware samples tend to be variations of other samples. In programming, the more you can recycle, the better, and malware is no exception. Searching for patterns, signatures, and characteristics that have been found in other samples allows us to identify the type of malware much earlier than having to examine its code or behaviour, saving a lot of time. Furthermore, if the type of malware is known, analysing its code becomes easier (since you already know the features and peculiarities you’re looking for), and you can already have hints about its behaviour based on how similar malware behaves.
Requirements#
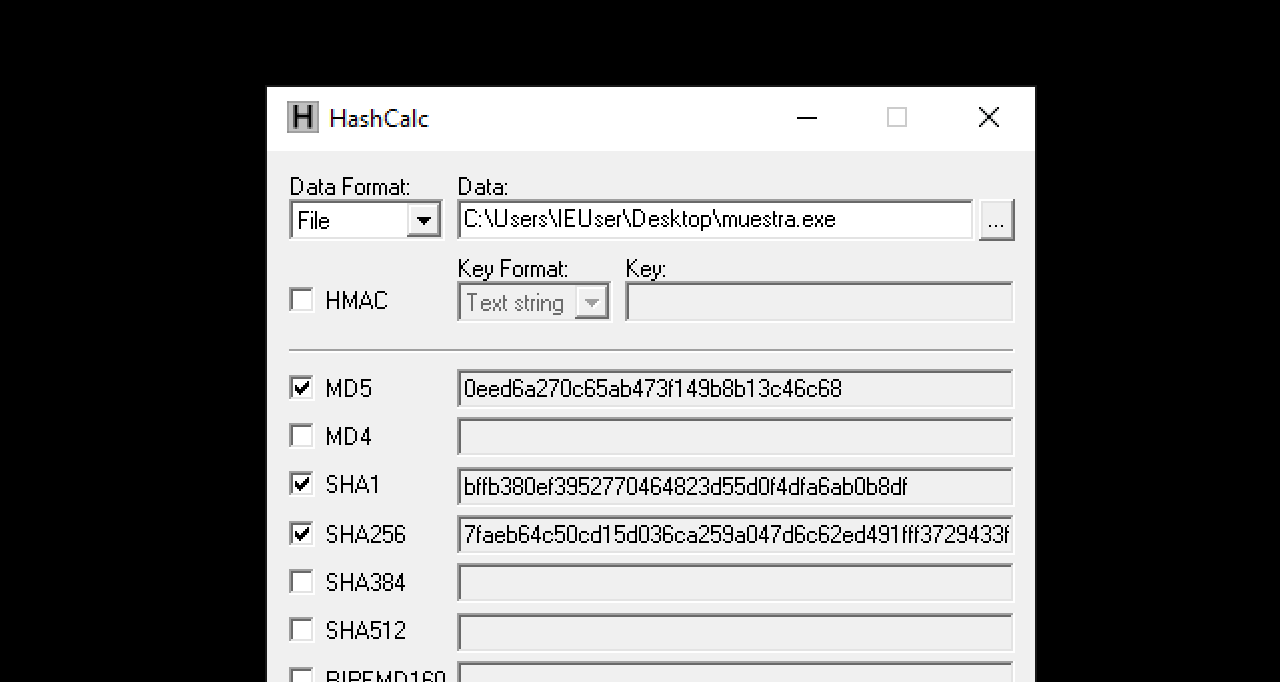
With all this in mind, let’s see how we can obtain basic information from a sample. For this, obviously, a malware sample is required. I’m going to use one that I analysed in the past, a Ryuk ransomware sample. The SHA-256 hash of the sample is as follows:
7faeb64c50cd15d036ca259a047d6c62ed491fff3729433fefba0b02c059d5ed
Any sample will do for this purpose, but the results will vary depending on the sample used. Obviously, since samples obtained from malware repositories like this one are already known, we’ve essentially spoiled what kind of sample it is. Analysing an unknown sample would not have this advantage. Nevertheless, the interesting part is to see to what extent we can extract information from the sample ourselves.
On the other hand, a secure environment is necessary to analyze the sample. To achieve this, a virtualized environment is required. The previous article mentioned several options. Even though the sample is for Windows in this case, this part can be done with both Linux and Windows machines, as for now, we’re not going to execute anything. For the dynamic analysis part, a Windows virtual machine is needed. In my case, to showcase a bit of both, I’m going to use both a Windows and a Linux virtual machine, specifically Remnux. I like to combine both as there are tools that are only available on one system or the other. Additionally, I’m more comfortable with the Linux terminal, but sometimes I prefer certain programs on Windows. As long as we use the same sample on both machines, there’s no issue. We can verify that we have the same sample on both by checking the integrity of the sample using its hash.
With this in place, let’s begin diving into the sample.
Obtaining the hashes#
The first step is to calculate the hashes of the sample. If obtained from a repository, you already have the hash, and it’s just a matter of verifying it for integrity purposes, i.e., ensuring that you have the desired sample. This can be done with various tools such as 7Zip or HashCalc for Windows, or you can use built-in commands available on certain systems, like most Linux distributions.

If using multiple machines, it’s recommended to perform this step on all of them to ensure consistency across the loaded samples.

Okay, now we have the sample on our system and ready for analysis. Where should we start?
In reality, as I mentioned before, there’s no defined order for this, but there are some basic processes that can be done quickly and tend to be among the first steps taken. These steps are chosen due to their simplicity as well as the information they might provide for more complex types of analysis, like code or behavioural analysis. In this part, we’ll cover a couple of basic static analysis techniques: analysing strings and metadata.
File Type#
Even though we know in this case that it’s a malware sample for Windows, it’s generally a good practice to determine the type of sample you’re dealing with. If the sample were unknown, this could help us understand whether it’s a binary or not, and for the former case, which architecture and operating system it’s intended for. Depending on this, different machines, tools, and techniques might be required. The simplest way is to use something like the file command in Linux.

This confirms what we already knew, that it’s a 32-bit Windows executable. It’s mentioned that it’s a PE32 executable. Later on, we’ll delve into the details of the PE32 binary format and how to analyze its structure in more detail to extract information about this type of sample. For now, since we know it’s a binary, let’s try to extract its strings.
Strings Analysis#
Anyone who has ever programmed has had to read code.
In fact, most of the time, developers spend more time reading code than writing it. Any programmer with even a bit of experience has sat down in front of some codebase to understand how a program works because they’ve been handed a project at work, forked a project to extend it, or are reading a Stack Overflow answer. Regardless of the reason, one of the easiest ways to understand what code does is to look at the messages it displays or the strings it contains. Those prints and logs that gives info to users and developers also gives info to other programmers. Therefore, one of the most basic things you can do when analysing malware is to analyze strings.
However, there’s an issue. Usually, the malware samples you’ll encounter are compiled samples. They won’t make your day by showing you their code. So, how do you do it? Reverse engineering?
Yes and no. Although reverse engineering can yield disassembled code or even higher-level code, it’s not yet necessary. A string is essentially a sequence of bytes with a specific encoding, such as ASCII or UTF-8. By attempting to interpret the bytes using a specific encoding to see if we get readable text, we can potentially find strings.
Obviously, we shouldn’t do this manually. There are many tools for this purpose. Many hexadecimal editors offer string search options. On Windows, the easiest way is to use strings.exe, a SysInternal tool for Windows that extracts strings from a binary. SysInternals tools are powerful tools for both Windows system administrators and malware analysts. Having them in your toolbox is a must. The equivalent of this tool on Linux is the strings command.
Running it on the binary will show the detected strings (I’ve shortened the output as it generates a lot of noise and false positives).
!This program cannot be run in DOS mode.
.text
.rdata
@.data
.rsrc
DllUnregisterServer
catsrv.dll
IsProcessorFeaturePresent
GlobalUnlock
GetUserDefaultUILanguage
GetCurrentProcess
QueryPerformanceCounter
GetFileAttributesW
LoadLibraryExW
CloseHandle
InitializeCriticalSectionAndSpinCount
InitializeSListHead
GetCurrentThreadId
LoadLibraryA
TerminateProcess
CreateEventW
GetModuleHandleW
GetProcAddress
SetUnhandledExceptionFilter
VirtualProtectEx
UnhandledExceptionFilter
GlobalAlloc
GlobalLock
DeleteCriticalSection
IsDebuggerPresent
GetModuleFileNameW
GetCurrentProcessId
GetLastError
OutputDebugStringW
GetStartupInfoW
kernel32.dll
DllGetClassObject
msident.dll
CoUninitialize
CoInitialize
CoCreateGuid
ole32.dll
UuidCreate
rpcrt4.dll
CloseClipboard
EnableWindow
DrawIcon
IsIconic
EmptyClipboard
OpenClipboard
GetClientRect
SendMessageW
GetSystemMenu
GetParent
GetForegroundWindow
SetClipboardData
LoadIconW
AppendMenuW
GetSystemMetrics
user32.dll
<?xml version='1.0' encoding='UTF-8' standalone='yes'?>
<assembly xmlns = 'urn:schemas-microsoft-com:asm.v1' manifestVersion = '1.0'>
  <trustInfo xmlns = "urn:schemas-microsoft-com:asm.v3">
    <security>
      <requestedPrivileges>
        <requestedExecutionLevel level = 'asInvoker' uiAccess = 'false' />
      </requestedPrivileges>
    </security>
  </trustInfo>
</assembly>
VeriSign, Inc.1+0)
"VeriSign Time Stamping Services CA0
070615000000Z
120614235959Z0\1
VeriSign, Inc.1402
+VeriSign Time Stamping Services Signer - G20
http://ocsp.verisign.com0
"http://crl.verisign.com/tss-ca.crl0
TSA1-20
Western Cape1
Durbanville1
Thawte1
Thawte Certification1
Thawte Timestamping CA0
031204000000Z
131203235959Z0S1
VeriSign, Inc.1+0)
"VeriSign Time Stamping Services CA0
http://ocsp.verisign.com0
0http://crl.verisign.com/ThawteTimestampingCA.crl0
TSA2048-1-530
VeriSign, Inc.1
VeriSign Trust Network1;09
2Terms of use at https://www.verisign.com/rpa (c)09100.
'VeriSign Class 3 Code Signing 2009-2 CA0
Moscow1
Moscow1
Kaspersky Lab1>0<
5Digital ID Class 3 - Microsoft Software Validation v21
Technical dept1
Kaspersky Lab0
3http://csc3-2009-2-crl.verisign.com/CSC3-2009-2.crl0D
https://www.verisign.com/rpa0
http://ocsp.verisign.com0?
3http://csc3-2009-2-aia.verisign.com/CSC3-2009-2.cer0
VeriSign, Inc.1705
.Class 3 Public Primary Certification Authority0
090521000000Z
190520235959Z0
VeriSign, Inc.1
VeriSign Trust Network1;09
2Terms of use at https://www.verisign.com/rpa (c)09100.
'VeriSign Class 3 Code Signing 2009-2 CA0
https://www.verisign.com/cps0*
https://www.verisign.com/rpa0
#http://logo.verisign.com/vslogo.gif0
http://ocsp.verisign.com01
 http://crl.verisign.com/pca3.crl0)
Class3CA2048-1-550
xEv1
Washington1
Redmond1
Microsoft Corporation1)0'
 Microsoft Code Verification Root0
060523170129Z
160523171129Z0_1
VeriSign, Inc.1705
.Class 3 Public Primary Certification Authority0
Dhttp://crl.microsoft.com/pki/crl/products/MicrosoftCodeVerifRoot.crl0
VeriSign, Inc.1
VeriSign Trust Network1;09
2Terms of use at https://www.verisign.com/rpa (c)09100.
'VeriSign Class 3 Code Signing 2009-2 CA
VeriSign, Inc.1+0)
"VeriSign Time Stamping Services CA
100907170408Z0#
There are strings that will almost always appear, like the DOS headers (the "!This program cannot be run in DOS mode" is a compatibility mechanism from Microsoft that has been present for decades) or some that are simply false positives. What’s interesting is to see if any of these strings provide information about what the binary does.
Among all the observed strings, you can notice two types of strings:
- References to libraries and functions: In a binary, it’s common to find references to functions from external libraries, as programs often need external libraries (whether from the system or not) to perform certain tasks. These functions can provide hints about the capabilities of the binary—what things it can do. For example, if it contains functions to interact with files, it can interact with files. However, this doesn’t show all the capabilities a binary might have, as there are ways to hide this, which we’ll see later.
- Information about certificates (mentions of VeriSign, Microsoft, etc.): This might indicate that the binary is signed. Signing a binary is a way to evade antivirus systems. We can verify if it’s signed using various tools.
As you can see in this case, unfortunately, the strings don’t seem to provide much information about what the binary does. No strings specific to the program, like output messages or program variables, have been detected. In such cases, there are two possibilities: either the sample doesn’t contain interesting strings, or they are obfuscated. Regardless, it’s always a good idea to try various methods for string extraction. Using SysInternal’s tool is the simplest approach. If you use different applications, like PEStudio, and compare the results among them, you might get more insights.
But if the strings are obfuscated, how can you detect them? There are tools designed to detect this type of obfuscated strings. If common techniques have been used, such as using a code packer (like UPX) or simple obfuscation techniques (like XOR-ing the binary data), such tools might be able to detect them. Tools like FLOSS can be used to search for this kind of data.

For the sake of brevity, I haven’t included the full FLOSS output here, but the tool doesn’t detect more strings than what strings found. At this point, it seems with this sample we haven’t had much luck. The absence of easily discoverable strings could indicate the use of obfuscation techniques. Obfuscating both data and code is common in the world of malware (and not only in the malware world—these techniques are also used to protect intellectual property, for example). In any case, in the upcoming parts, we’ll delve more into detecting obfuscations, such as analysing binary sections and entropy analysis.
Metadata#
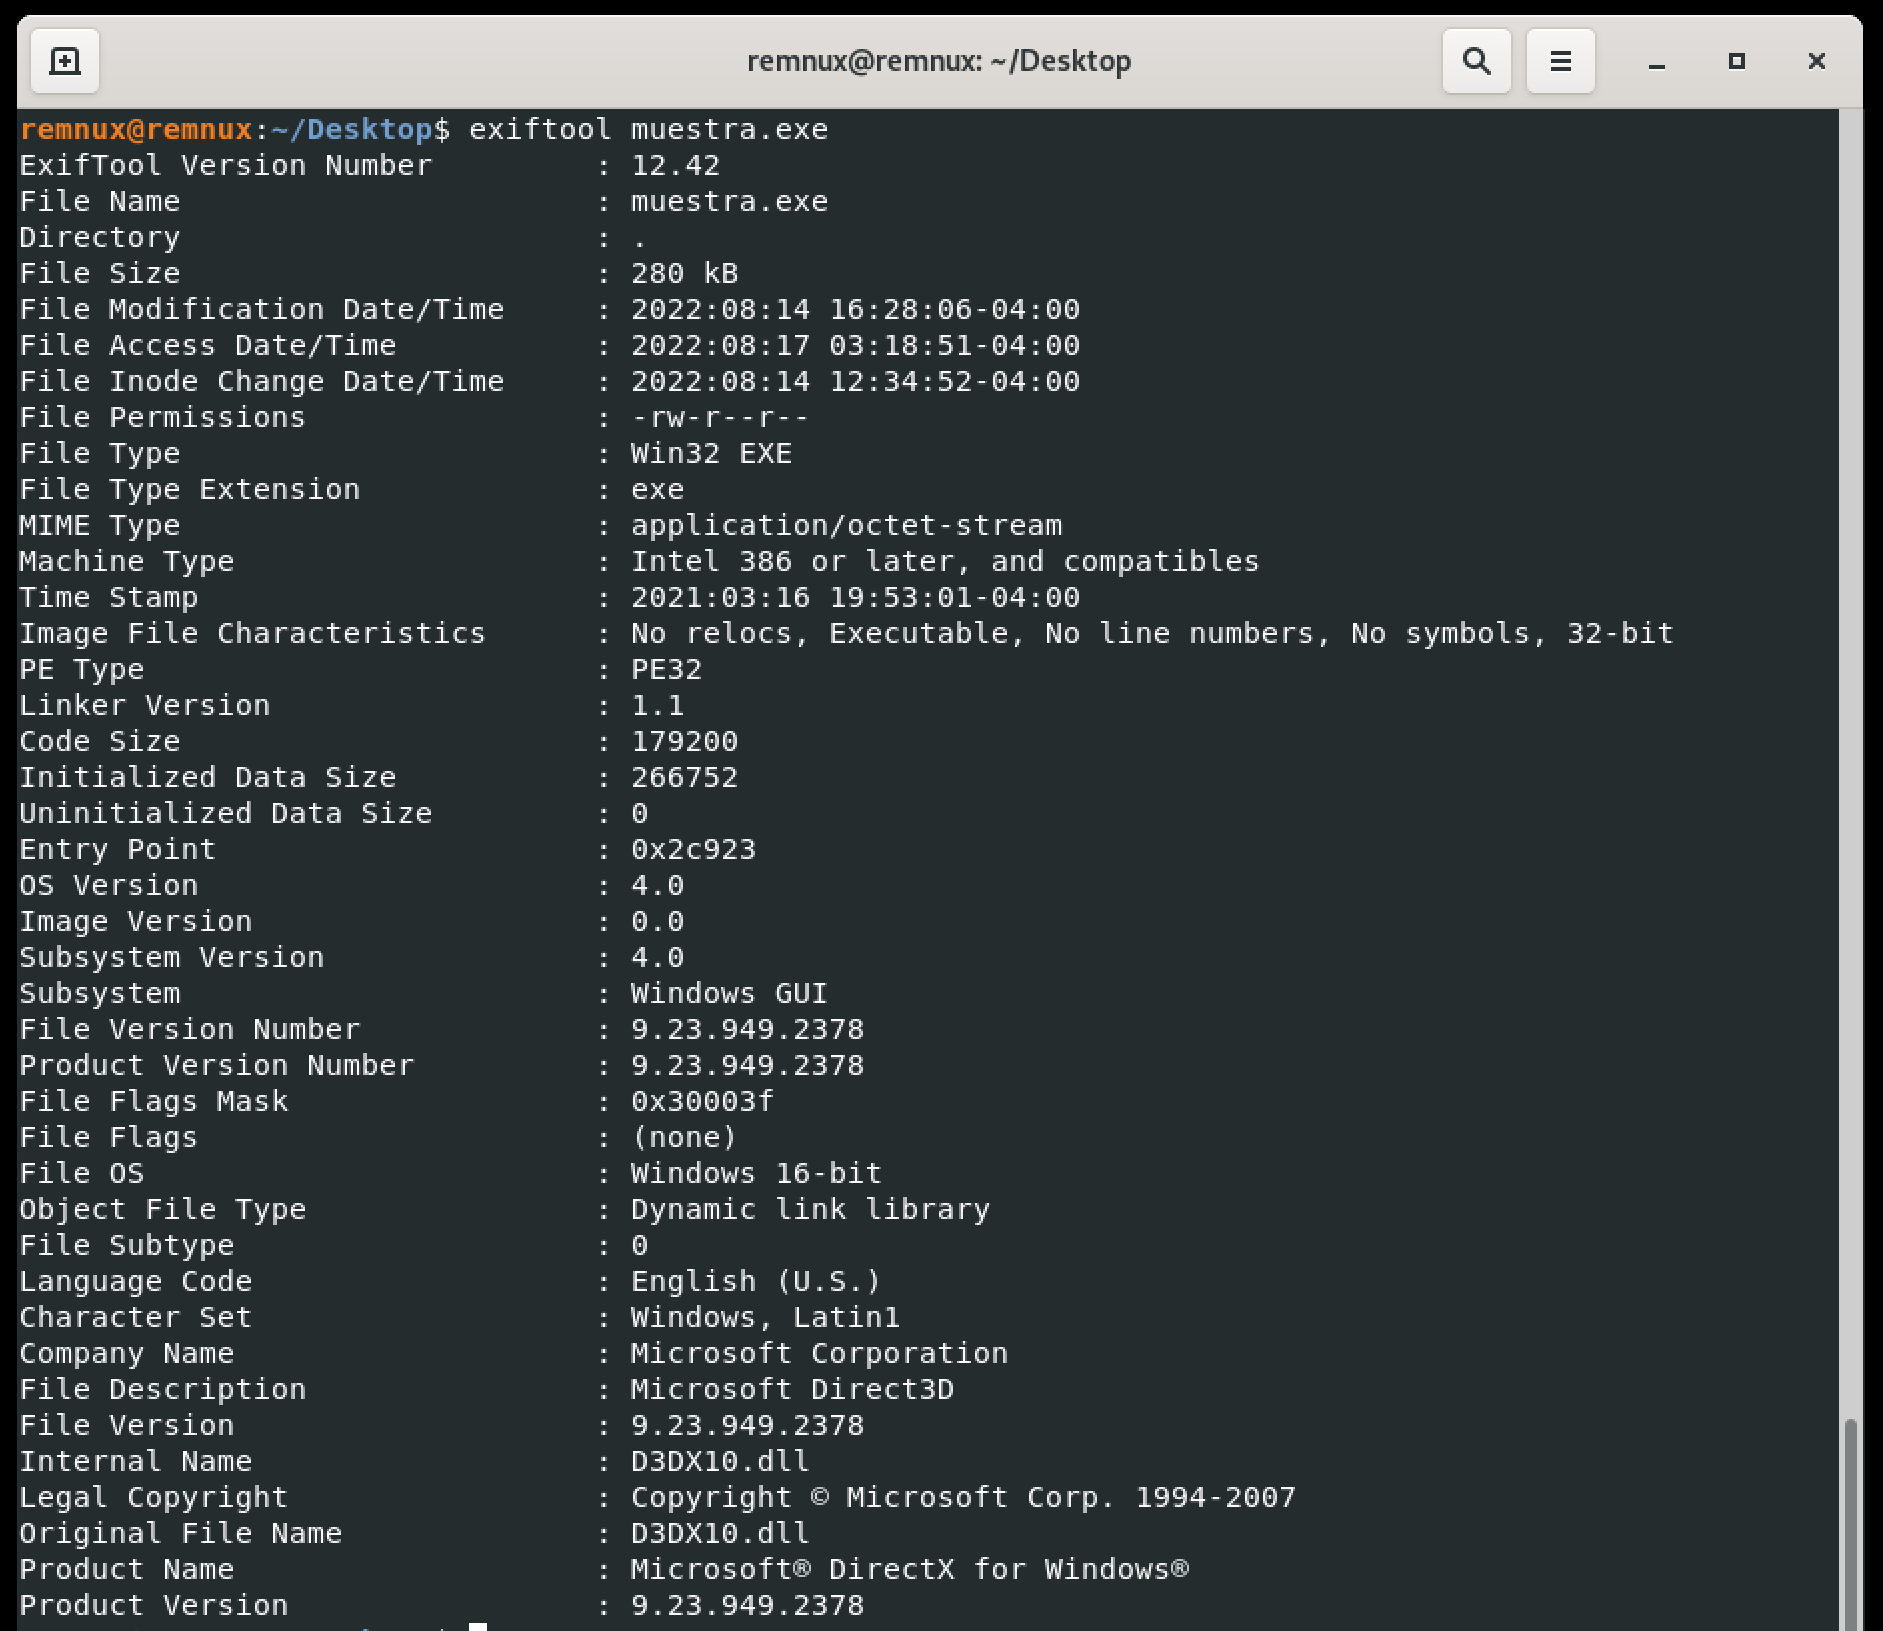
As this is getting quite lengthy, I’ll only cover one more basic aspect in this part: metadata analysis. Like any file, malware samples can contain interesting metadata. I say “can” because they might have been removed, overwritten by another system, or even deliberately modified to make the analysis more difficult. Even tho, it’s always worth analysing them to see if there’s any information to be found.
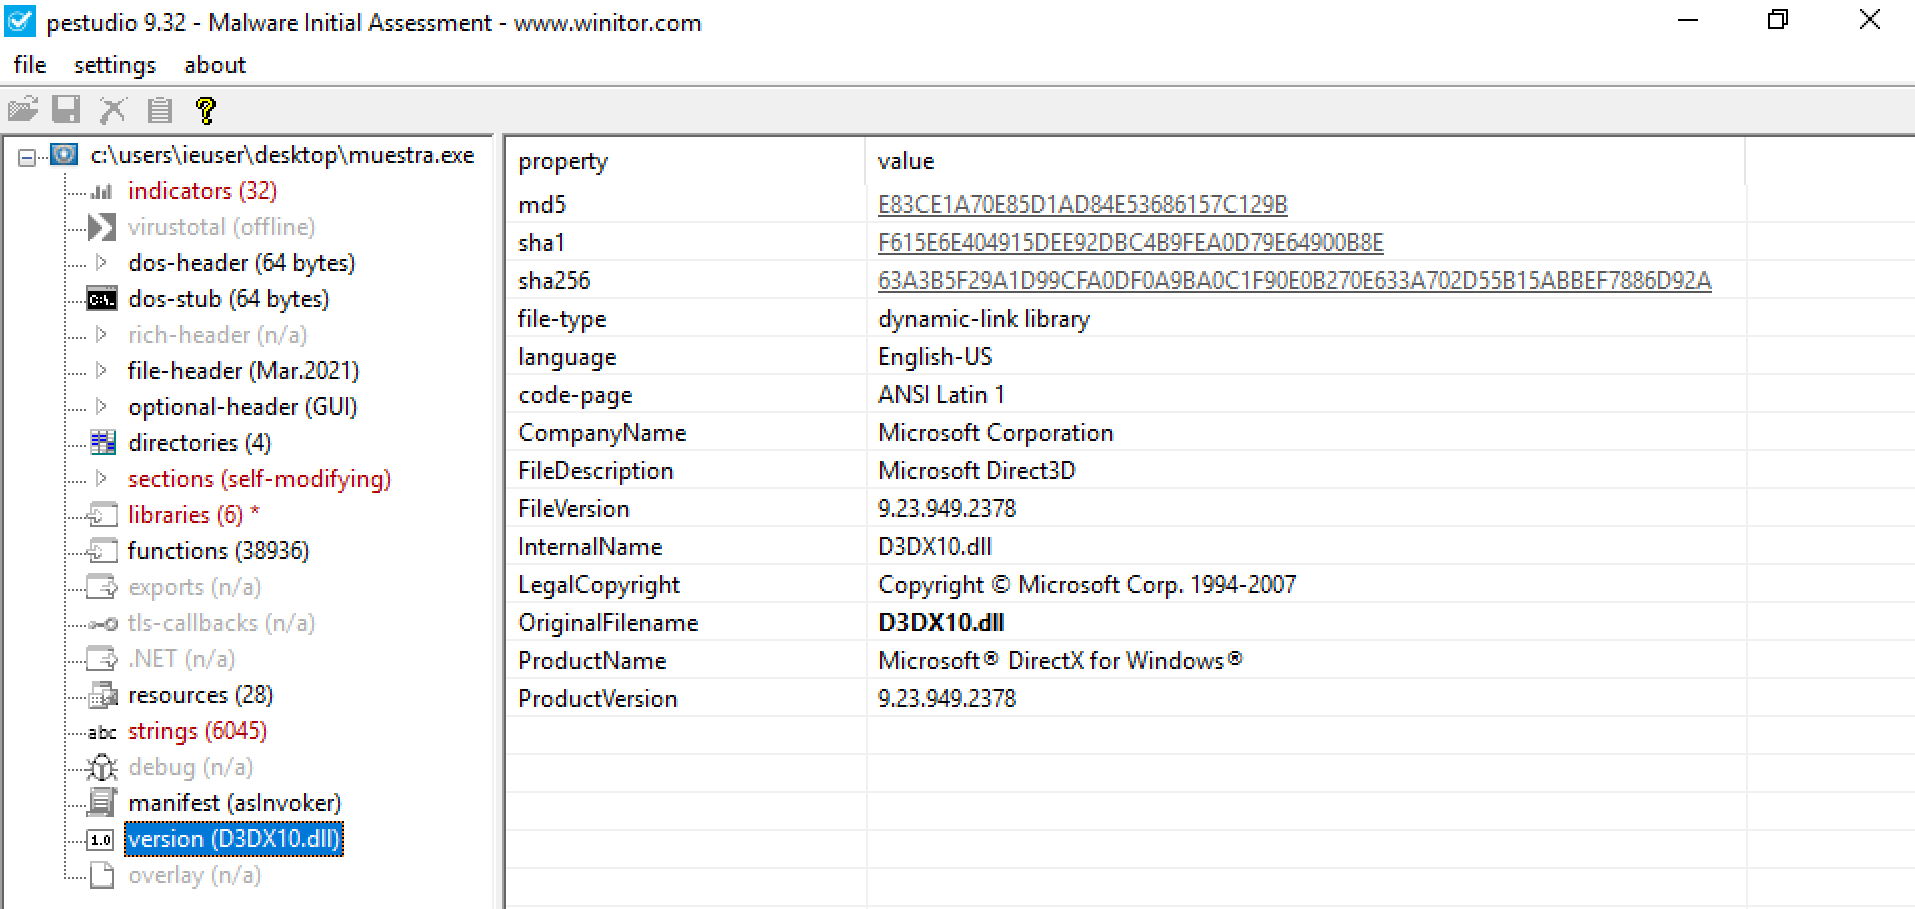
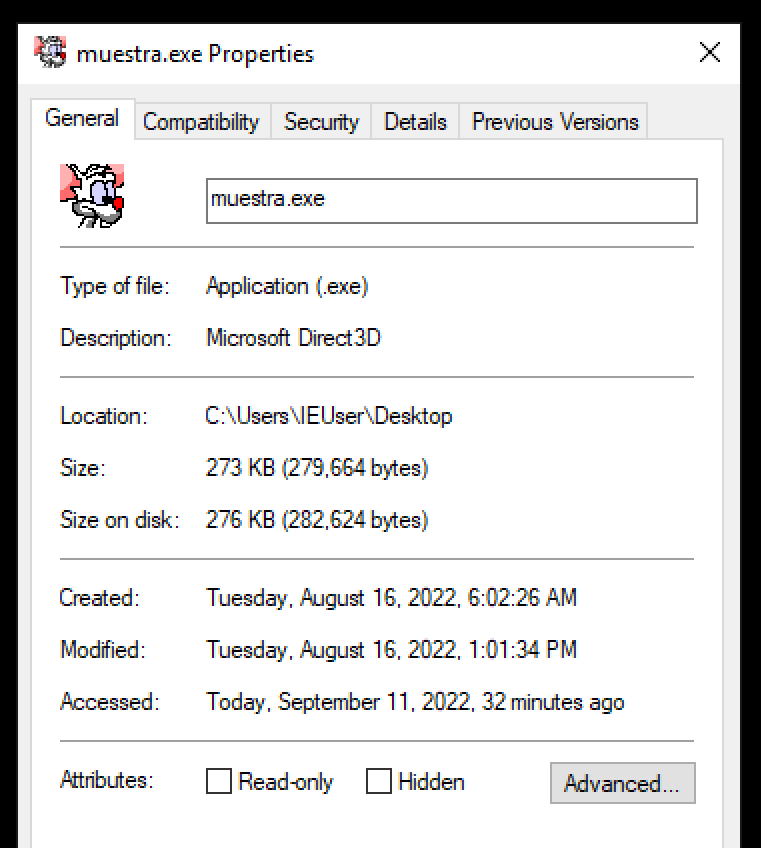
There are countless applications for metadata analysis. The simplest way (and one we’ve all used at some point) is the classic method of right-clicking on the file and viewing its properties. There are also applications that allow you to do this and present the information in a more detailed and organized manner. Personally, I like to use PEStudio (which, among many other features, also displays metadata) and ExifTool, which is well-known for extracting metadata not only from binaries but from any kind of file (as the name suggests, it’s commonly used for analysing photo metadata).


In the metadata, we don’t see anything highly relevant, but we do see information about a Microsoft certificate, suggesting that the binary might be signed. You can verify this in various ways, such as using the file properties or with functions like Get-AuthenticodeSignature.

If done through file properties, in the case of a valid certificate, the properties would show a new tab with information about the certificate. In this case, it doesn’t seem to have a certificate.

Checking with PowerShell gives us the same result. This doesn’t necessarily mean it’s not signed; it could be because the signature is expired or the certificate used isn’t valid. Even if it’s supposedly signed with a Microsoft certificate, if these certificates are compromised (which has happened before), they’re revoked, so systems won’t consider them valid. In this case, based on the metadata information, it seems to be the case.
Conclusions#
Starting with malware analysis is a relatively straightforward task (don’t worry, it’s going to get more complex). Although we haven’t obtained much information so far, the fact that we haven’t found clues in the strings or the presence of a suspicious certificate already gives us hints that the file is malicious (in this case, we already knew, but when analysing unknown samples, these are interesting clues).
However, static analysis is just getting started. In the next part, I intend to delve more into these techniques, technically analysing the binary and its sections, and going into more detail on how to detect obfuscation techniques. We’ll talk about concepts like entropy.
But for now, stay safe and happy hacking!