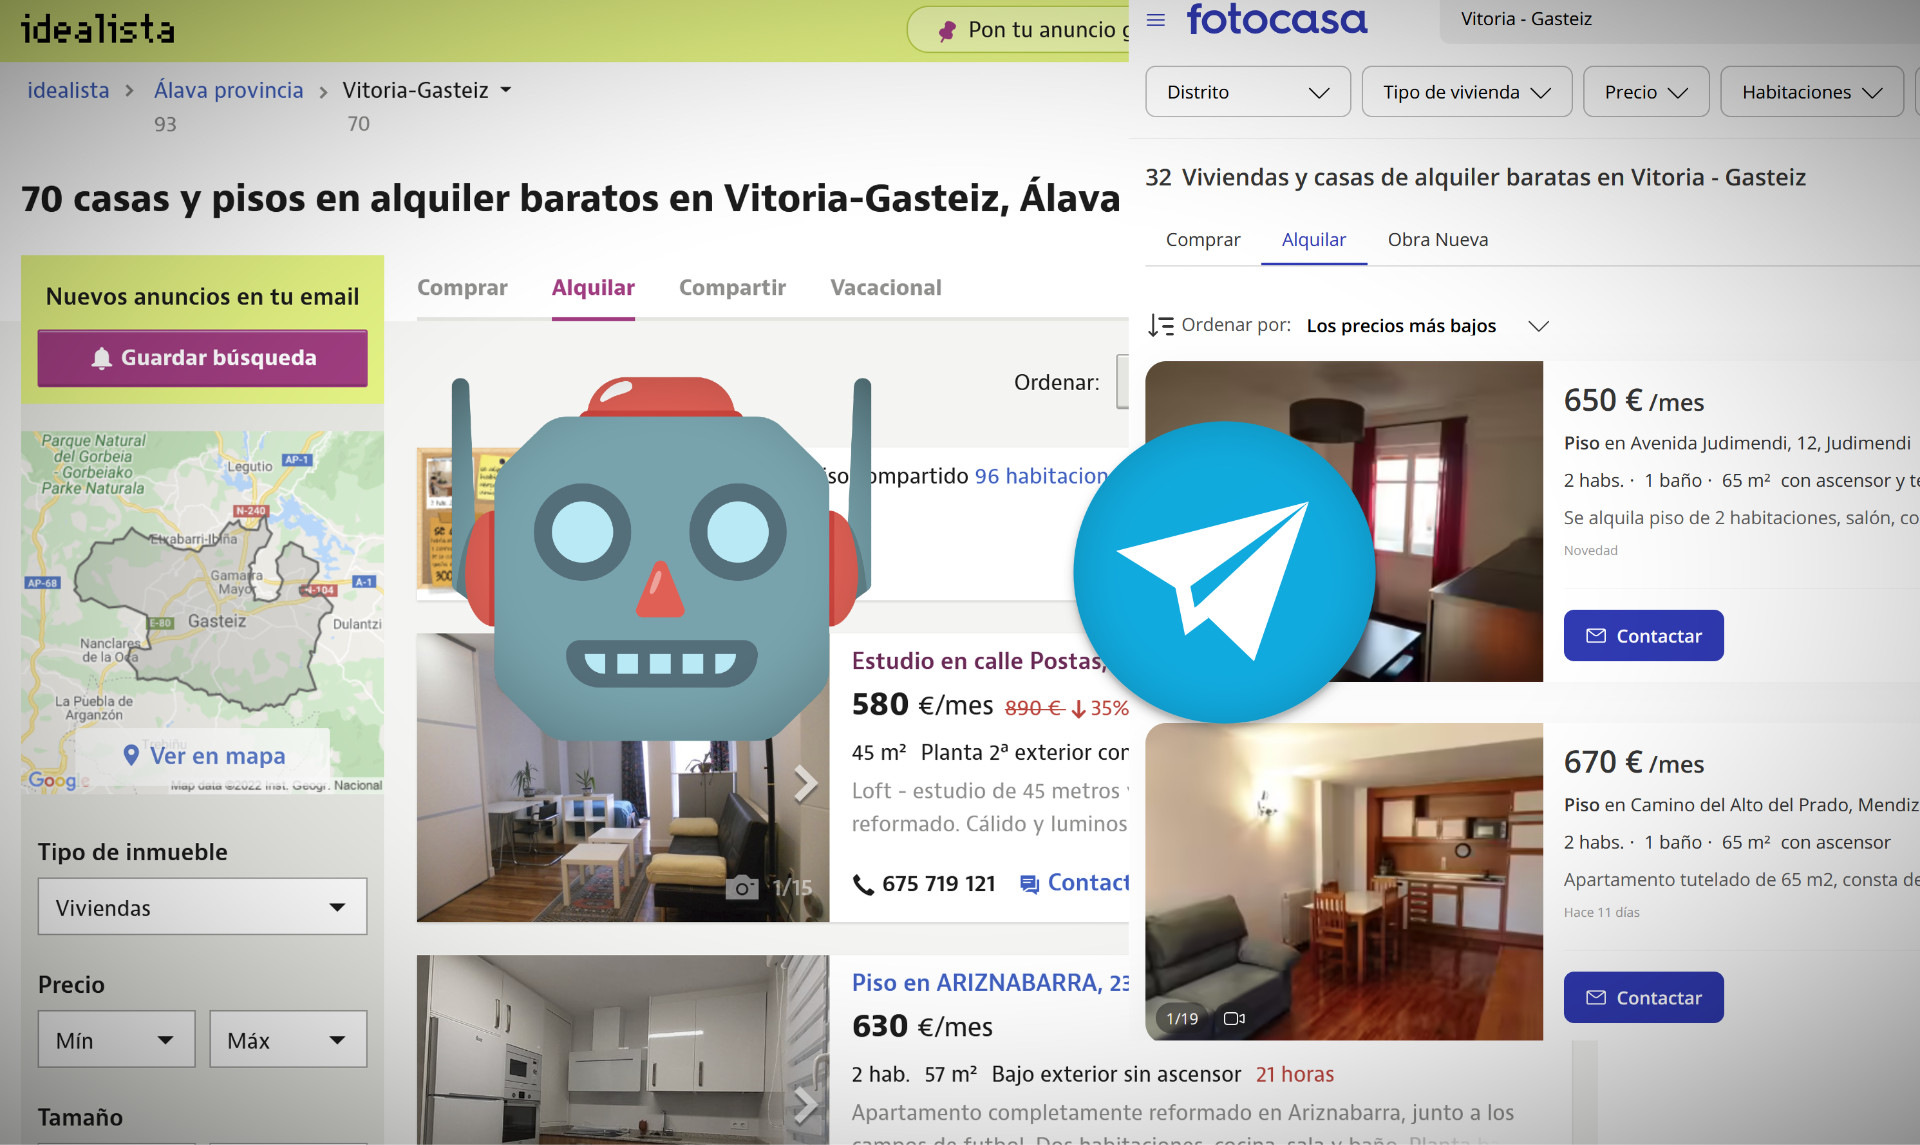
How to automate flat-hunting with a Telegram bot
I am looking for a flat. Looking for a flat is a shitty process. There is a strangely small number of flats in my city and the ones that are available disappear quickly.
I’m too lazy to spend all my time looking for a flat. It’s not really that complicated, but sometimes I’m busy and I forget to look that day, or I’m out and it’s more hassle with my phone.
I’ve been wanting to make a Telegram bot for a while now. I didn’t know exactly what to do, but the other day I got an idea and I created a bot that tells me about the available flats in my city.

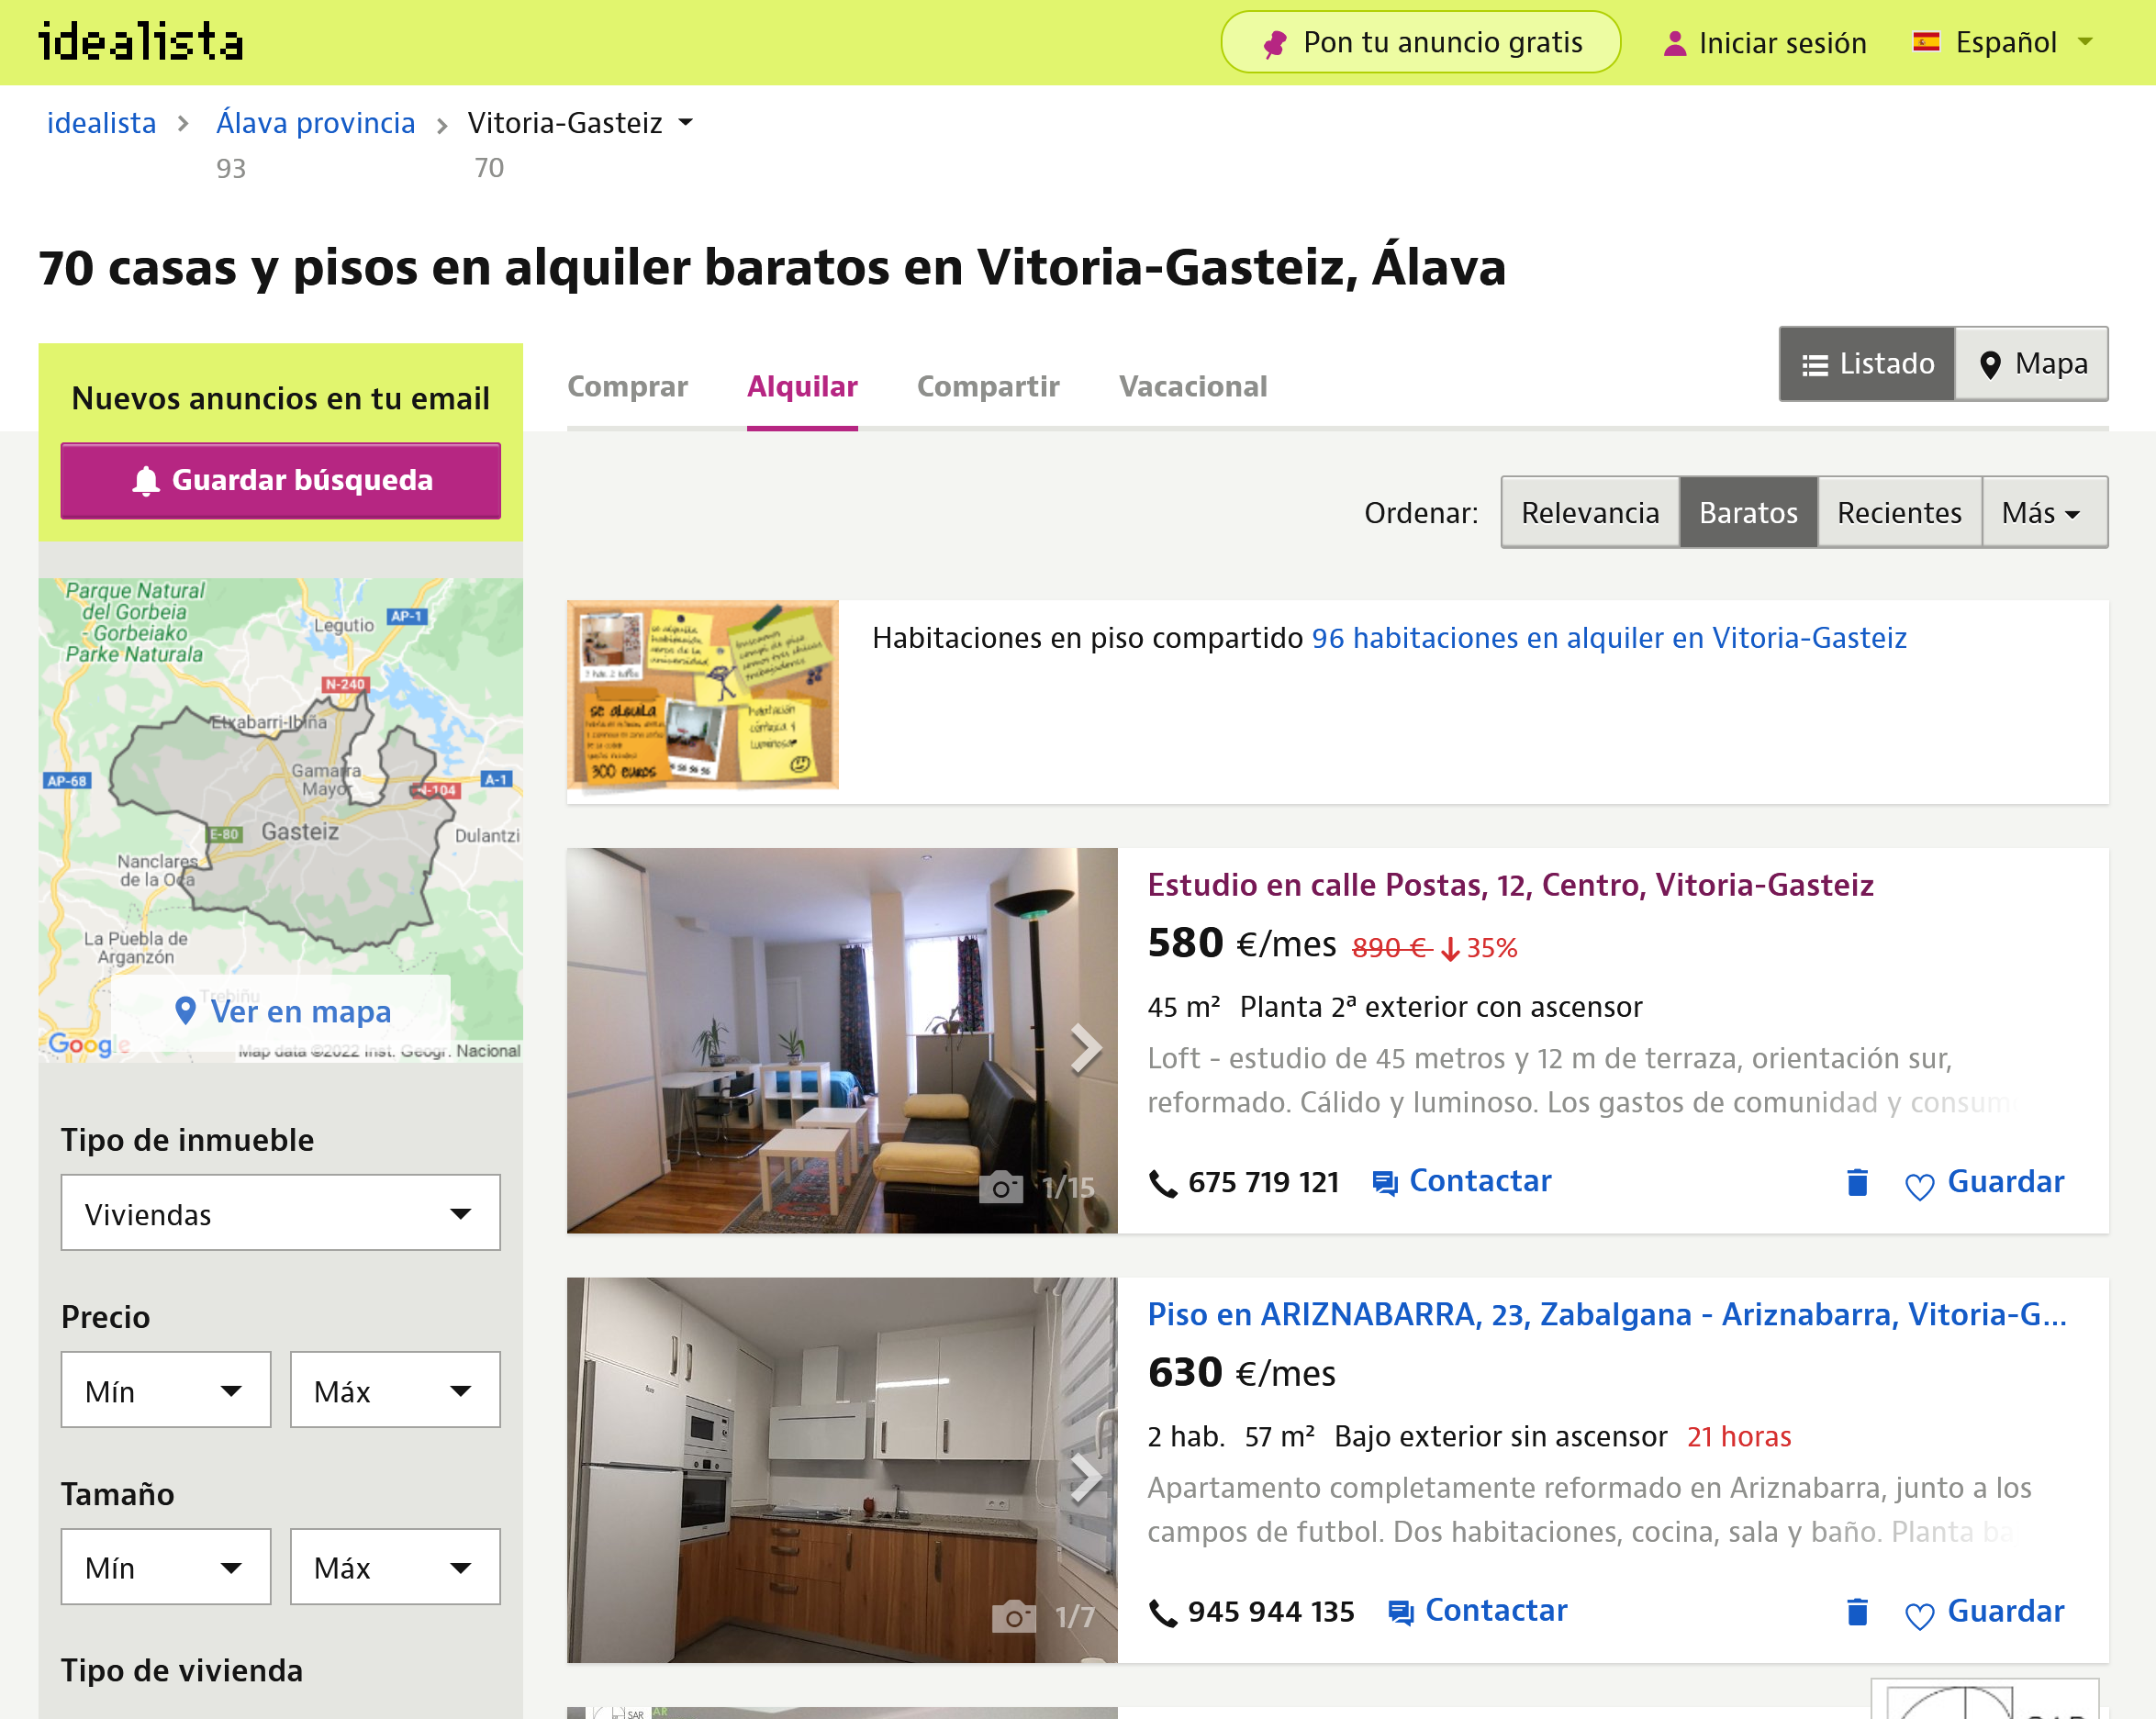
There are two parts involved in this. One is the web scraping part. This is basically automating the extraction of information from websites. Nowadays almost everything is done from the internet and looking for a flat is not going to be any different. Practically all local real estate agencies and individuals who rent flats post their ads on certain platforms (in Spain maily in platforms such as Idealista or Fotocasa), so by consulting there I can see what new options are appearing. It’s basically what I was doing so far manually and without enough constancy. Automating it with web scraping allows me to get all that information at a glance.
The other part is the Telegram bot. Until two days ago I had no idea how it worked. Basically Telegram has a great API so you can do everything with it. You can create bots that run anywhere to communicate directly with users, write in chats or channels and do a lot of things. There is also a very good wrapper for Python that you can use to interact with the API from Python in a very simple way.
Part 1: web scraping with Selenium#
It’s not the first time I have done web scraping. Some time ago I made a script that allowed to scrape instagram to download all the images of a user. You can have a look at the post I made or the code of the bot (it’s a bot, but it’s not a Telegram bot).
When I made that script I used Selenium, which is probably the best web scraping tool out there. It’s not just for that, but it allows you to automate browser operations. With this, you can open websites, browse them, perform actions and extract information from them programmatically. This is much better than directly sending a request with a request handling library, because by actually launching an instance of a browser, you can bypass measures that some websites have in place to block automated mechanisms. The downside is that, since you have to open a browser, you can’t run it in an environment that doesn’t have a screen (although this can be easily solved with screen-simulating libraries such as PyVirtualDisplay).
With the tools ready and installed, all that remains is to use Selenium to start web scraping. The simpler the scraping the better. In this case, instead of passing the base URL of a flat search site, you can extract the URLs with the parameters to filter the search. In my case, and using Idealista as an example, the URL would be something like this:
https://www.idealista.com/alquiler-viviendas/vitoria-gasteiz-alava/?ordenado-por=precios-asc
As you can see, I am already filtering by my city, and apart from that, I’m sorting by price to display the cheapest ones first (there’s not much money around here). This could be narrowed down even further. Since most websites of this kind use search parameters in the URL itself (i.e. query parameters, very useful for save as bookmarks later), a lot of scraping work can be saved by simply targeting the endpoint with specific query parameters.

With that in mind, I’ve created a simple function that scrapes that page and retrieves flat-related info. I’ve also included an option to filter by price (although this is something that can also be done through the URL). The code is as follows:
def scrap_idealista(max_price):
    driver = initialize_driver(IDEALISTA_URL)
    scroll_down_and_up(driver)

    # Be kind and accept the cookies
    try:
        driver.find_element_by_id('didomi-notice-agree-button').click()
    except:
        pass # No cookies button, no problem!

    # Find each flat element
    elements = driver.find_element_by_xpath('//*[@id="main-content"]')
    items = elements.find_elements_by_class_name('item-multimedia-container')

    flat_list = []

    for item in items:
        # Get the link for that flat
        link = item.find_element_by_xpath('./div/a[@href]')
        link = link.get_attribute('href')

        # Get the price for that flat
        result = re.search('.*\\n(.*)€\/mes', item.text)
        price_str = result.group(1).replace('.', '')
        price = int(price_str)

        if price <= max_price:
            flat_list.append({
                'link': link,
                'price': price,
                'image': item.screenshot_as_png,
                'image_name': item.id + '.png'
            })

    driver.quit()
    return flat_list
Overall, it’s quite straightforward to comprehend. First and foremost, the Selenium driver is loaded, and the page is scrolled through entirely. Initially, the web page is loaded to have everything ready to start the search. The scrolling is done because, sometimes, results are loaded as you scroll, so performing a quick scroll before extracting information ensures that all results are actually loaded.
def initialize_driver(url):
    driver = webdriver.Chrome(executable_path='./chromedriver.exe')
    driver.get(url)
    sleep(2)
    driver.set_window_position(0,0)
    driver.set_window_size(1920, 1080)
    return driver
Using Selenium is quite straightforward. In this case, I’m using the Chrome driver, which I have right in my directory for convenience. After that, I load the URL and set up the window to have a decent size. This is important because elements will be positioned differently depending on the window size. Responsive design is great, but it’s one of the worst enemies of a scraper. So, setting a consistent resolution is important to consistently obtain the same results.
def scroll_down_and_up(driver):
    driver.execute_script('window.scrollTo(0, document.body.scrollHeight);')
    sleep(2)
    driver.execute_script('window.scrollTo(0, 0);')
Regarding scrolling, there’s nothing special here. Just a bit of JS and we’re good to go.
The real deal comes next. Firstly, accepting cookies to navigate the site smoothly and avoid any oddities. This is where the power of Selenium starts to shine.
driver.find_element_by_id('didomi-notice-agree-button').click()
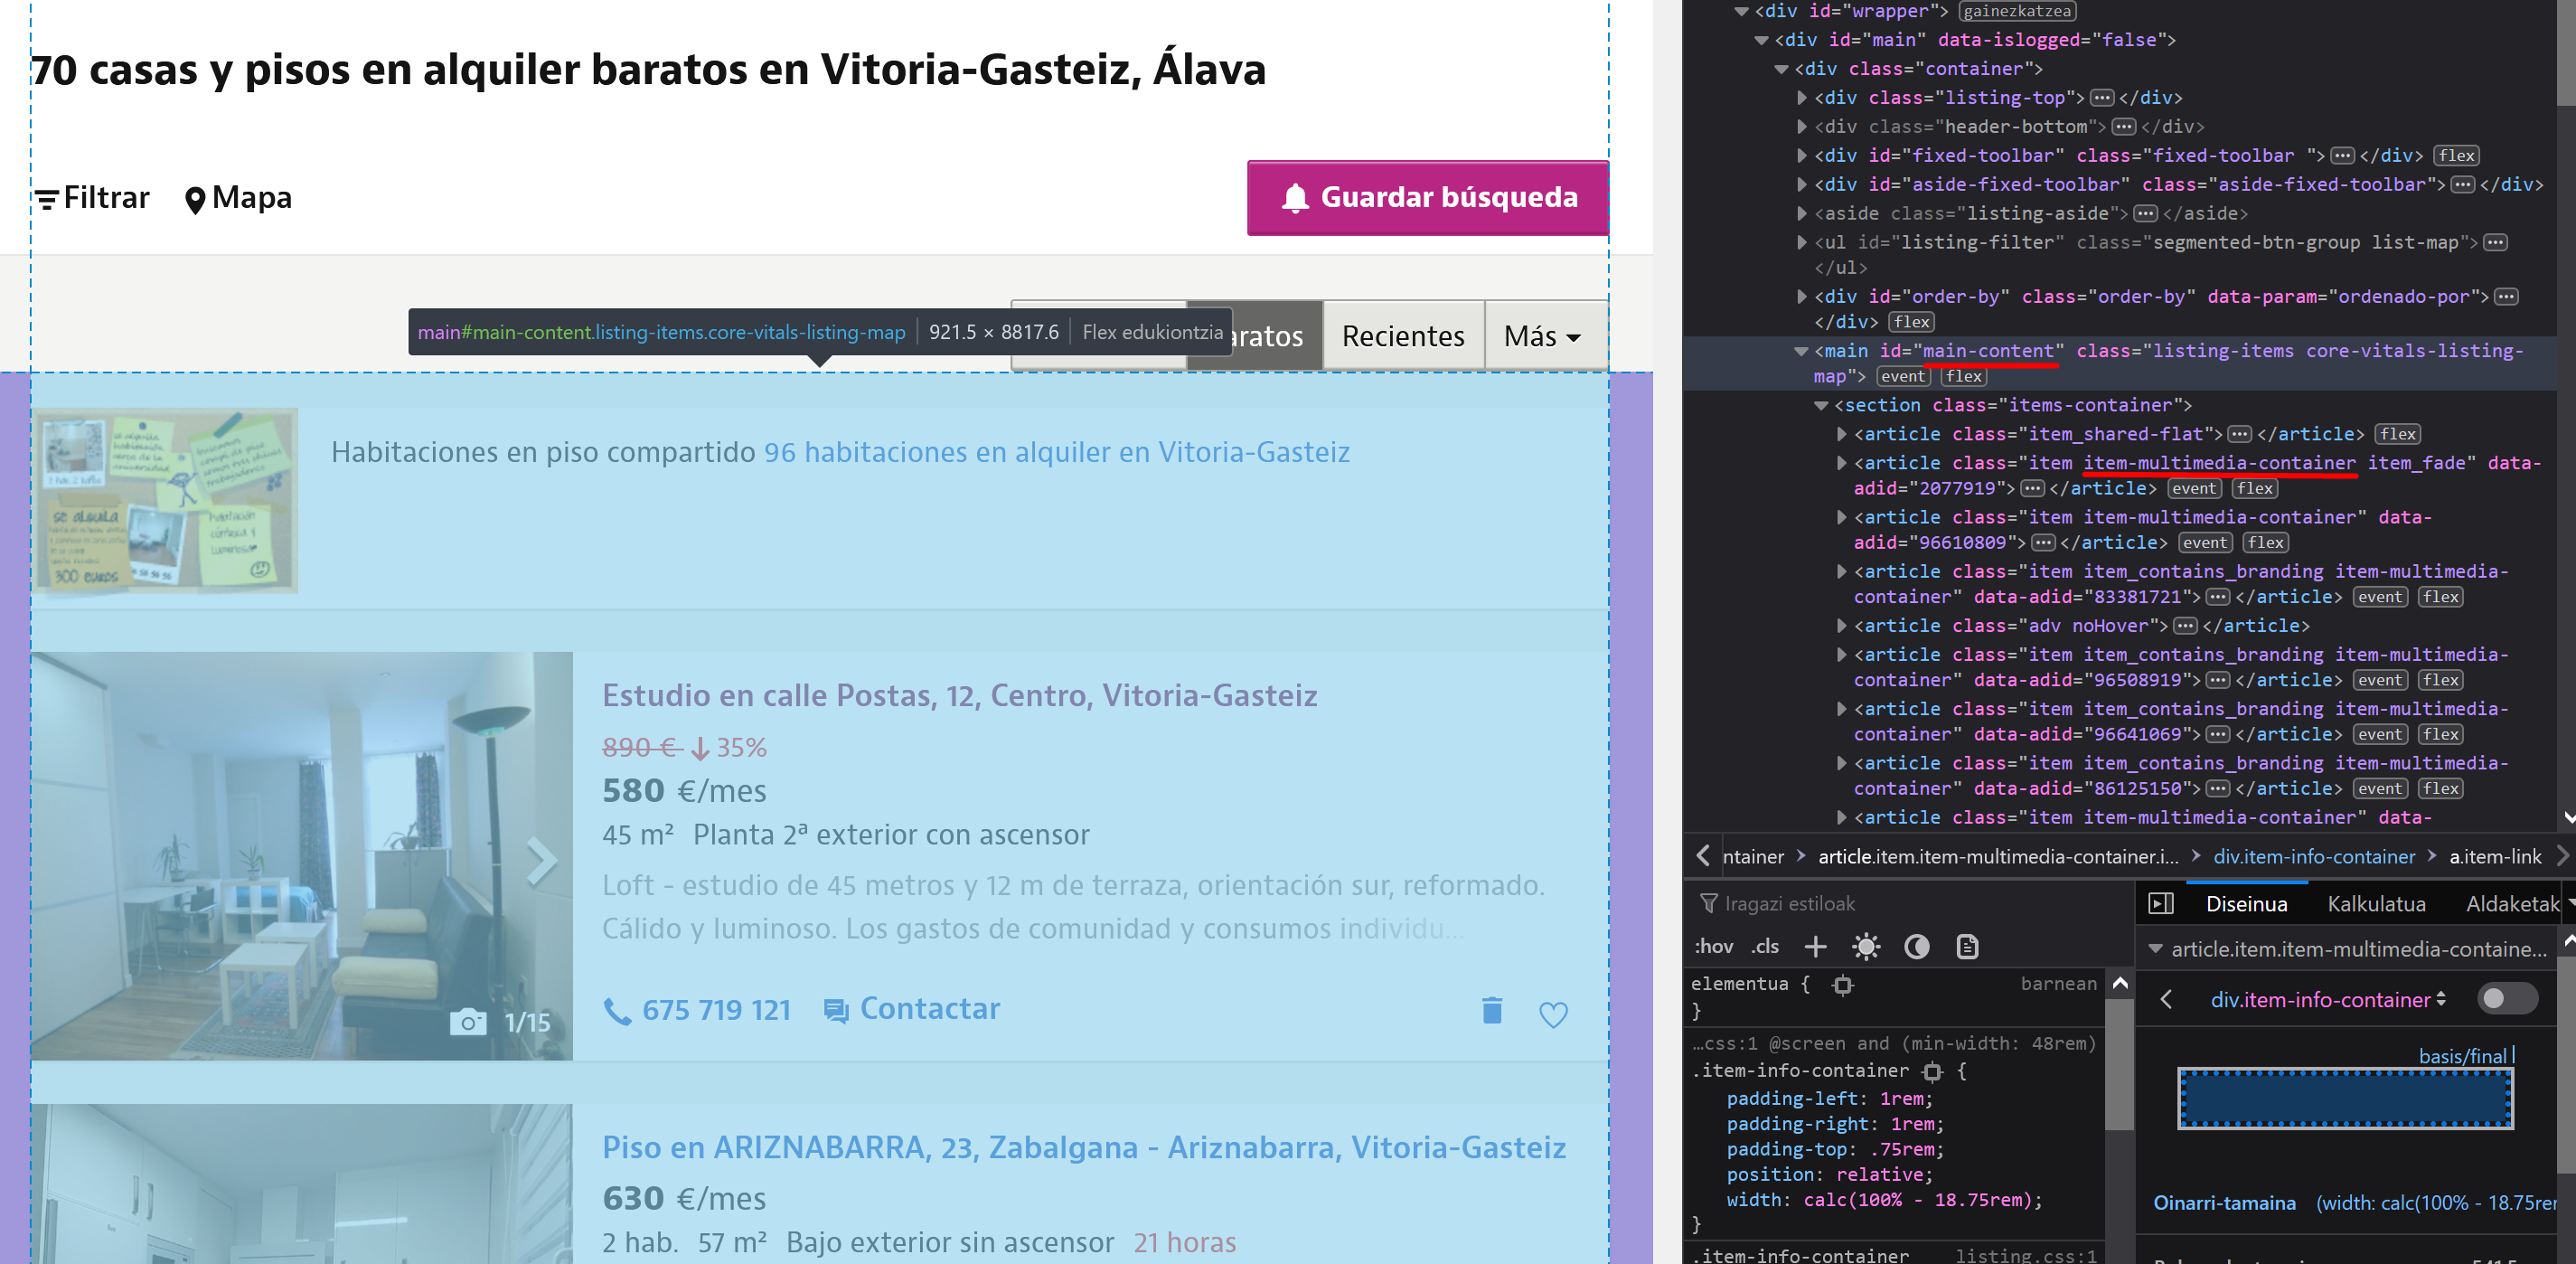
The element with that ID is selected, in this case a button, and then clicked. The next step is to find the elements with the flat information. Those little cards that appear in a list. Like all elements on a website, they have classes or attributes that identify them.
elements = driver.find_element_by_xpath('//*[@id="main-content"]')
items = elements.find_elements_by_class_name('item-multimedia-container')
In this case, I’ve performed searches using XPath and through class names. If you look at the Idealista website, you can extract this information. It will be different on each website. The great thing about Selenium is that it lets you retrieve elements and then search within them. This way, you can proceed step by step until you reach your intended target.

Searching through IDs and classes is simple. Searching through XPath is more complex but very powerful. This process can be simplified with an extension like xPath Finder, which allows you to obtain the XPath of any element on a webpage.
With that, we now have a list of items, which are each of those little cards. At this point, the next step is to extract the information we want to retrieve.
for item in items:
    # Get the link for that flat
    link = item.find_element_by_xpath('./div/a[@href]')
    link = link.get_attribute('href')

    # Get the price for that flat
    result = re.search('.*\\n(.*)€\/mes', item.text)
    price_str = result.group(1).replace('.', '')
    price = int(price_str)

    if price <= max_price:
        flat_list.append({
            'link': link,
            'price': price,
            'image': item.screenshot_as_png
        })
There are many ways to achieve this. Selenium allows you to extract the element as an image, which can be useful for sending it in that format later. In my case, I extract the apartment as an image (to send it via Telegram), the price (to check that it doesn’t exceed the set limit), and the link (to include alongside each image for accessing the apartments I’m interested in). The image name allows me to manage the images for sending them through Telegram.
And that’s it, it’s that simple. Now, all that’s left is to send this information through Telegram.
Part 2: creating a Telegram bot#
Crear un bot de Telegram es tan sencillo como usar BotFather, el bot que te permite crear bots. Tras crear un bot con él, te da un token que es lo que te permite hacer lo que quieras con la API. La creación del bot es trivial, consiste en hablar con el bot.
Una vez teniendo un token se puede hacer uso del wrapper para Python que he mencionado. Instalar con pip y listo. Del wrapper he utilizado lo siguiente:
Creating a Telegram bot is as simple as using BotFather, the bot that allows you to create bots. After creating a bot with it, you will receive a token that enables you to interact with the API. Bot creation is straightforward; it involves having a conversation with the bot.
Once you have a token, you can utilize the Python wrapper I mentioned. Install it using pip, and you’re all set. From the wrapper, I’ve used the following features:
import telegram
from telegram import Bot, Update
from telegram.ext import Updater
from telegram.ext import CallbackContext
from telegram.ext import CommandHandler
With it, you can instantiate the bot using the obtained token and create callbacks that allow you to easily listen for commands.
def init():
    with open('token.txt') as f:
        token = f.read()

    updater = Updater(token=token, use_context=True)
    dispatcher = updater.dispatcher

    logging.basicConfig(format='%(asctime)s - %(name)s - %(levelname)s - %(message)s',
                        level=logging.INFO)

    dispatcher.add_handler(CommandHandler('start', start))
    dispatcher.add_handler(CommandHandler('bilatu', bilatu))
    dispatcher.add_handler(CommandHandler('idealista', idealista))
    dispatcher.add_handler(CommandHandler('fotocasa', fotocasa))

    updater.start_polling()
That function is executed when the script starts. I fetch the token from a separate file and create the bot. In the code, you can see that four handlers are created. These are the commands that can be executed with the bot. In this case, they are /start, /bilatu (which means “search” in Basque), /idealista, and /fotocasa. This way, you can search in all sources or just in a specific one. The functions called with the callbacks are the following:
def bilatu(update: Update, context: CallbackContext):
    scrap(update, context, 'all')

def idealista(update: Update, context: CallbackContext):
    scrap(update, context, 'idealista')

def fotocasa(update: Update, context: CallbackContext):
    scrap(update, context, 'fotocasa')

def scrap(update: Update, context: CallbackContext, site):
    send_initial_message(context, update)
    max_price = get_max_price(context)
    flat_list = []
    if site in { 'idealista', 'all' }:
        flat_list.extend(scrap_idealista(max_price))
    if site in { 'fotocasa', 'all' }:
        flat_list.extend(scrap_fotocasa(max_price))
    send_results(flat_list, update, context)
    send_final_message(context, update)

def send_initial_message(context, update):
    context.bot.send_message(chat_id=update.effective_chat.id, text='Emaidazu minutu bat!')

def send_final_message(context, update):
    context.bot.send_message(chat_id=update.effective_chat.id, text='Hortxe dauzkazu!')
Essentially, different scraping functions are called based on the executed callback. The context and update objects allow you to obtain the bot instance and all the information related to the executed commands (which user executed them, in which chat, group or channel, whether arguments were provided, etc.). In this part, you can also see how simple it is to send a message with a bot using the bot.send_message() function.
The interesting part of this section is the send_results() function, which takes the output generated by the scraping functions (the list of apartments, each with all the mentioned information) and sends it via Telegram.
def send_results(flat_list: list, update: Update, context: CallbackContext):
    for flat in flat_list:
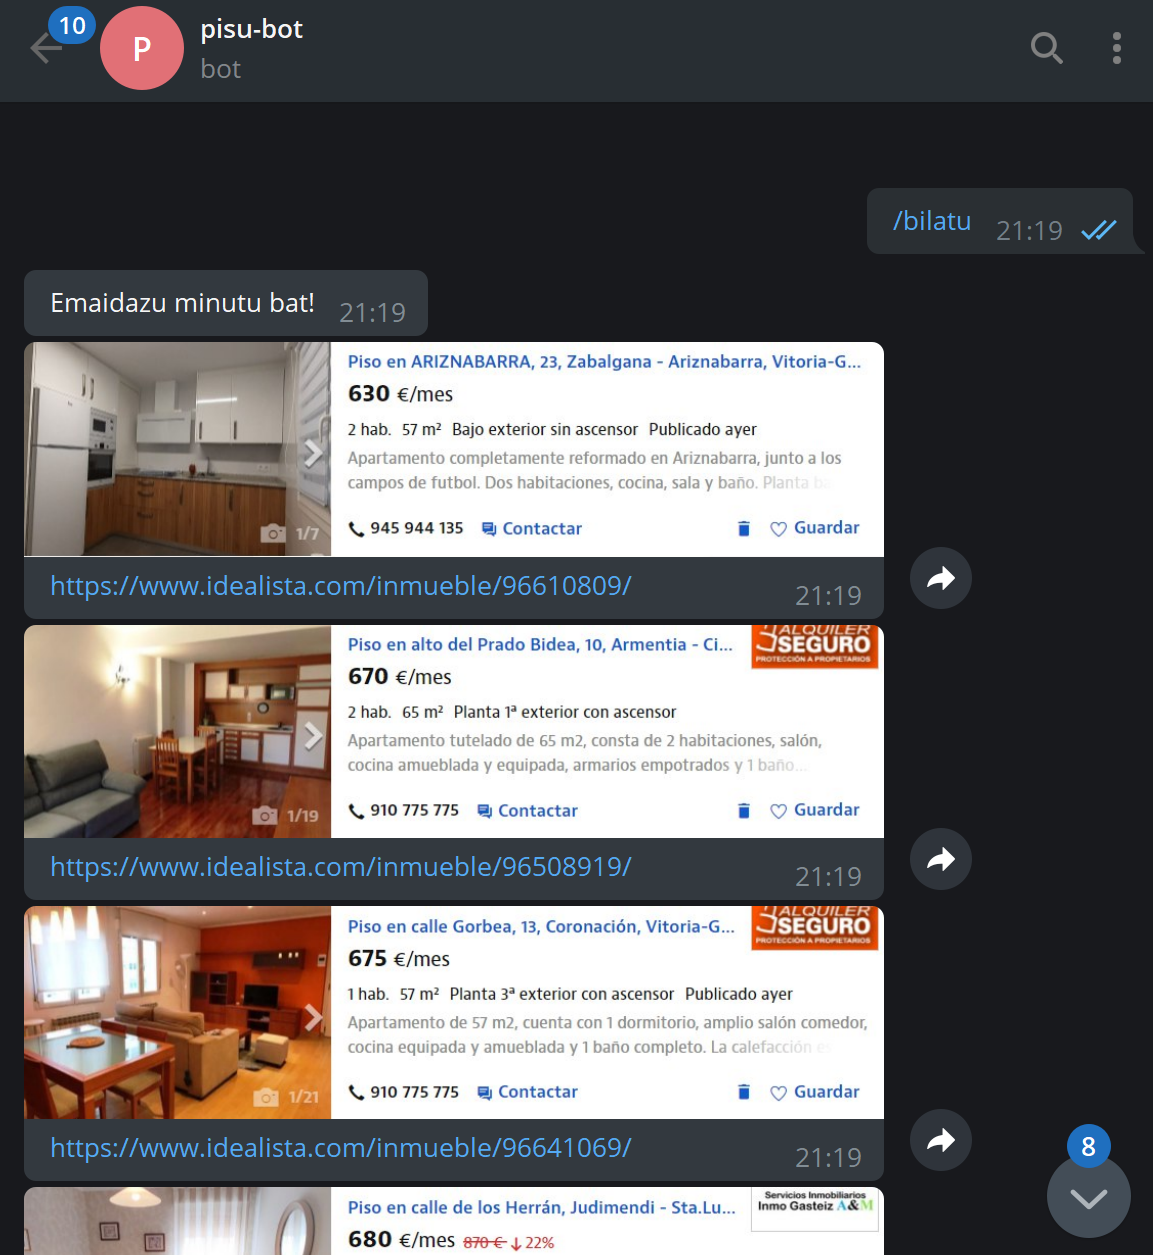
        context.bot.send_photo(chat_id=update.effective_chat.id, caption=flat['link'], photo=flat['image'])
        sleep(1)
This part is also quite straightforward. To send a message, you just need to indicate the chat ID (which is something received in the callbacks to know where the command was called from) and the content you want to send. As seen before, you can send a message with bot.send_message() by providing the chat and the text. In this case, you send the photo of each apartment with bot.send_photo(), specifying the collected image in the photo parameter and the link in the caption parameter.
With all of this, it’s as simple as running it and starting to search for apartments.

As it is, it seems quite elegant to me. Taking the entire element as an image allows you to see all the information at a glance, and including the link provides access to the listing for more details or direct contact with the landlord. Another option could have been to capture the text and create a list of apartments with their links, but the first approach appears to be one of the most elegant and certainly the simplest of them all.
Part 3: creating a Telegram channel to send the info to it#
Sí, con esto no tengo suficiente. Escribir un comando al bot es demasiado trabajo. Por ello, a parte de tener el bot así, he añadido un metodo para que el bot, cada cierto tiempo, escriba en un canal las ofertas que hay. Esto es basicamente lo msimo que hace por ejemplo el bot de Manfred con las ofertas de trabajo, pero con mayor frecuencia. Además, me gusta como en ese bot no va dejando los mensajes de días anteriores, sino que solo está el último mensaje. Así evita que se llene el canal de mierda y deja que haya solo lo que tiene que haber. Por ello, yo lo he hecho igual.
That is not enough for me. Typing a command to the bot is too much effort. That’s why, in addition to having the bot set up this way, I’ve added a method for the bot to periodically post offers in a channel. Essentially, this is similar to what, for instance, the Manfred bot does with job offers, but with higher frequency. Moreover, I like how that bot doesn’t leave messages from previous days; only the latest message remains. This prevents the channel from getting cluttered and keeps only the necessary content. Thus, I’ve implemented it the same way.
def update_channel():
    # Get channel and bot info
    with open('token.txt') as f:
        token = f.read()
    with open('channel_id.txt') as f:
        channel_id = f.read()

    bot = telegram.Bot(token=token)

    # Remove previously sended messages
    stacked_messages = []
    with open('sent_messages.txt', 'r') as f:
        for line in f.readlines():
            stacked_messages.append(int(line))
    while stacked_messages:
        bot.delete_message(chat_id=channel_id, message_id=stacked_messages.pop())

    # Scrap all with the defaul top price
    flat_list = []
    flat_list.extend(scrap_idealista(top_price))
    flat_list.extend(scrap_fotocasa(top_price))

    # Send the messages with the info
    # Saves the message_id of the messages to be able to delete them on the next one
    stacked_messages.append(bot.send_message(chat_id=channel_id, text='Kaixo! Hamen dauzkazu oraintxe bertan dauden pisuak:').message_id)
    for flat in flat_list:
        stacked_messages.append(bot.send_photo(chat_id=channel_id, caption=flat['link'], photo=flat['image']).message_id)
        sleep(1)
    stacked_messages.append(bot.send_message(chat_id=channel_id, text='Hortxe dauzkazu!').message_id)

    with open('sent_messages.txt', 'w') as f:
        for message in stacked_messages:
            f.write(str(message) + '\n')
I know, this is not the cleanest thing you’ve seen in your life. It’s basically more of the same but managing the messages that have been sent. Each sent message has a message_id, which is what allows later to be able to delete them. This function basically deletes whatever has been written before in the channel, scrapes the information, sends the information, and saves the message_id to be able to delete the messages next time. It saves those IDs in a file so that, if the bot crashes, they won’t be lost and can be deleted when it’s restarted, thus not leaving garbage in the channel.
In this case, it’s necessary to create an instance of Bot since it’s not received from anywhere. In addition to this, it’s necessary to have the ID of the chat or channel where you want to write. There are many bots that allow you to obtain those IDs.
The idea is to have the script running 24/7 and, in this way, the bot is always ready. On one hand, with the handlers listening, which is done with updater.start_polling() as seen before. On the other hand, there needs to be a way to execute the update_channel() function periodically. For this, we can use schedule, a library that allows you to schedule tasks easily. To install it, use pip and you’re done.
To use it to execute update_channel() at certain intervals, just add the following at the end of the init() function:
schedule.every().hour.at(":00").do(update_channel)

while True:
    schedule.run_pending()
    sleep(1)
As you can see, it’s very straightforward to use and the code explains itself. There’s no need to worry about the while True loop. The polling of callbacks runs in separate threads, so this doesn’t interfere. This keeps it indefinitely checking whether it needs to launch any tasks.
With all of this in place, all that’s left is to let it run somewhere. These kinds of things are perfect for a Raspberry Pi or something similar. It can also be set up on a VPS or wherever suits. The only thing to keep in mind is that it either needs a display or some library like the one mentioned to emulate it. Additionally, the browser that will be used must be installed.
You can also add more websites for scraping, it’s easily scalable. In my case, I use Idealista and Fotocasa, but you can simply add more scraping functions. Obviously, how you retrieve the information will vary from site to site.
Conclusions#
Creating a bot of this kind is a straightforward task, as you can see. The real challenge, however, lies in finding a decent flat that doesn’t cost an arm and a leg. That’s where the true difficulty lies.
Developing a bot to retrieve updated information can be very useful. Using web scraping instead of APIs has its advantages. First and foremost, most websites don’t offer APIs, so in those cases, there’s no other option. Even in cases where APIs are available, they might have limitations. The beauty of web scraping is that it allows you to gather exactly what you want, in the way you want it. And let no one deceive you; as long as you’re not hammering the website or extracting data massively, there’s no wrongdoing here.
I hope I’ve explained myself well and that if you’re reading this, it sparks your curiosity to tinker with these topics. As for me, I’m not going to stop exploring :)
Lastly, here’s the GitHub repository with the complete code. As always, feel free to do whatever you want with it.
And remember: Scraping is not a crime!